Creating an app
In the quick start we created a Feathers application in a single file to get a better understanding of how Feathers itself works.

The Feathers CLI allows us to initialize a new Feathers server with a recommended structure and generate things we commonly need like authentication, a database connection or new services. In this guide we will create a Feathers HTTP and real-time API for a chat application using the Feathers CLI. Using it, for example with a JavaScript frontend, looks like this:
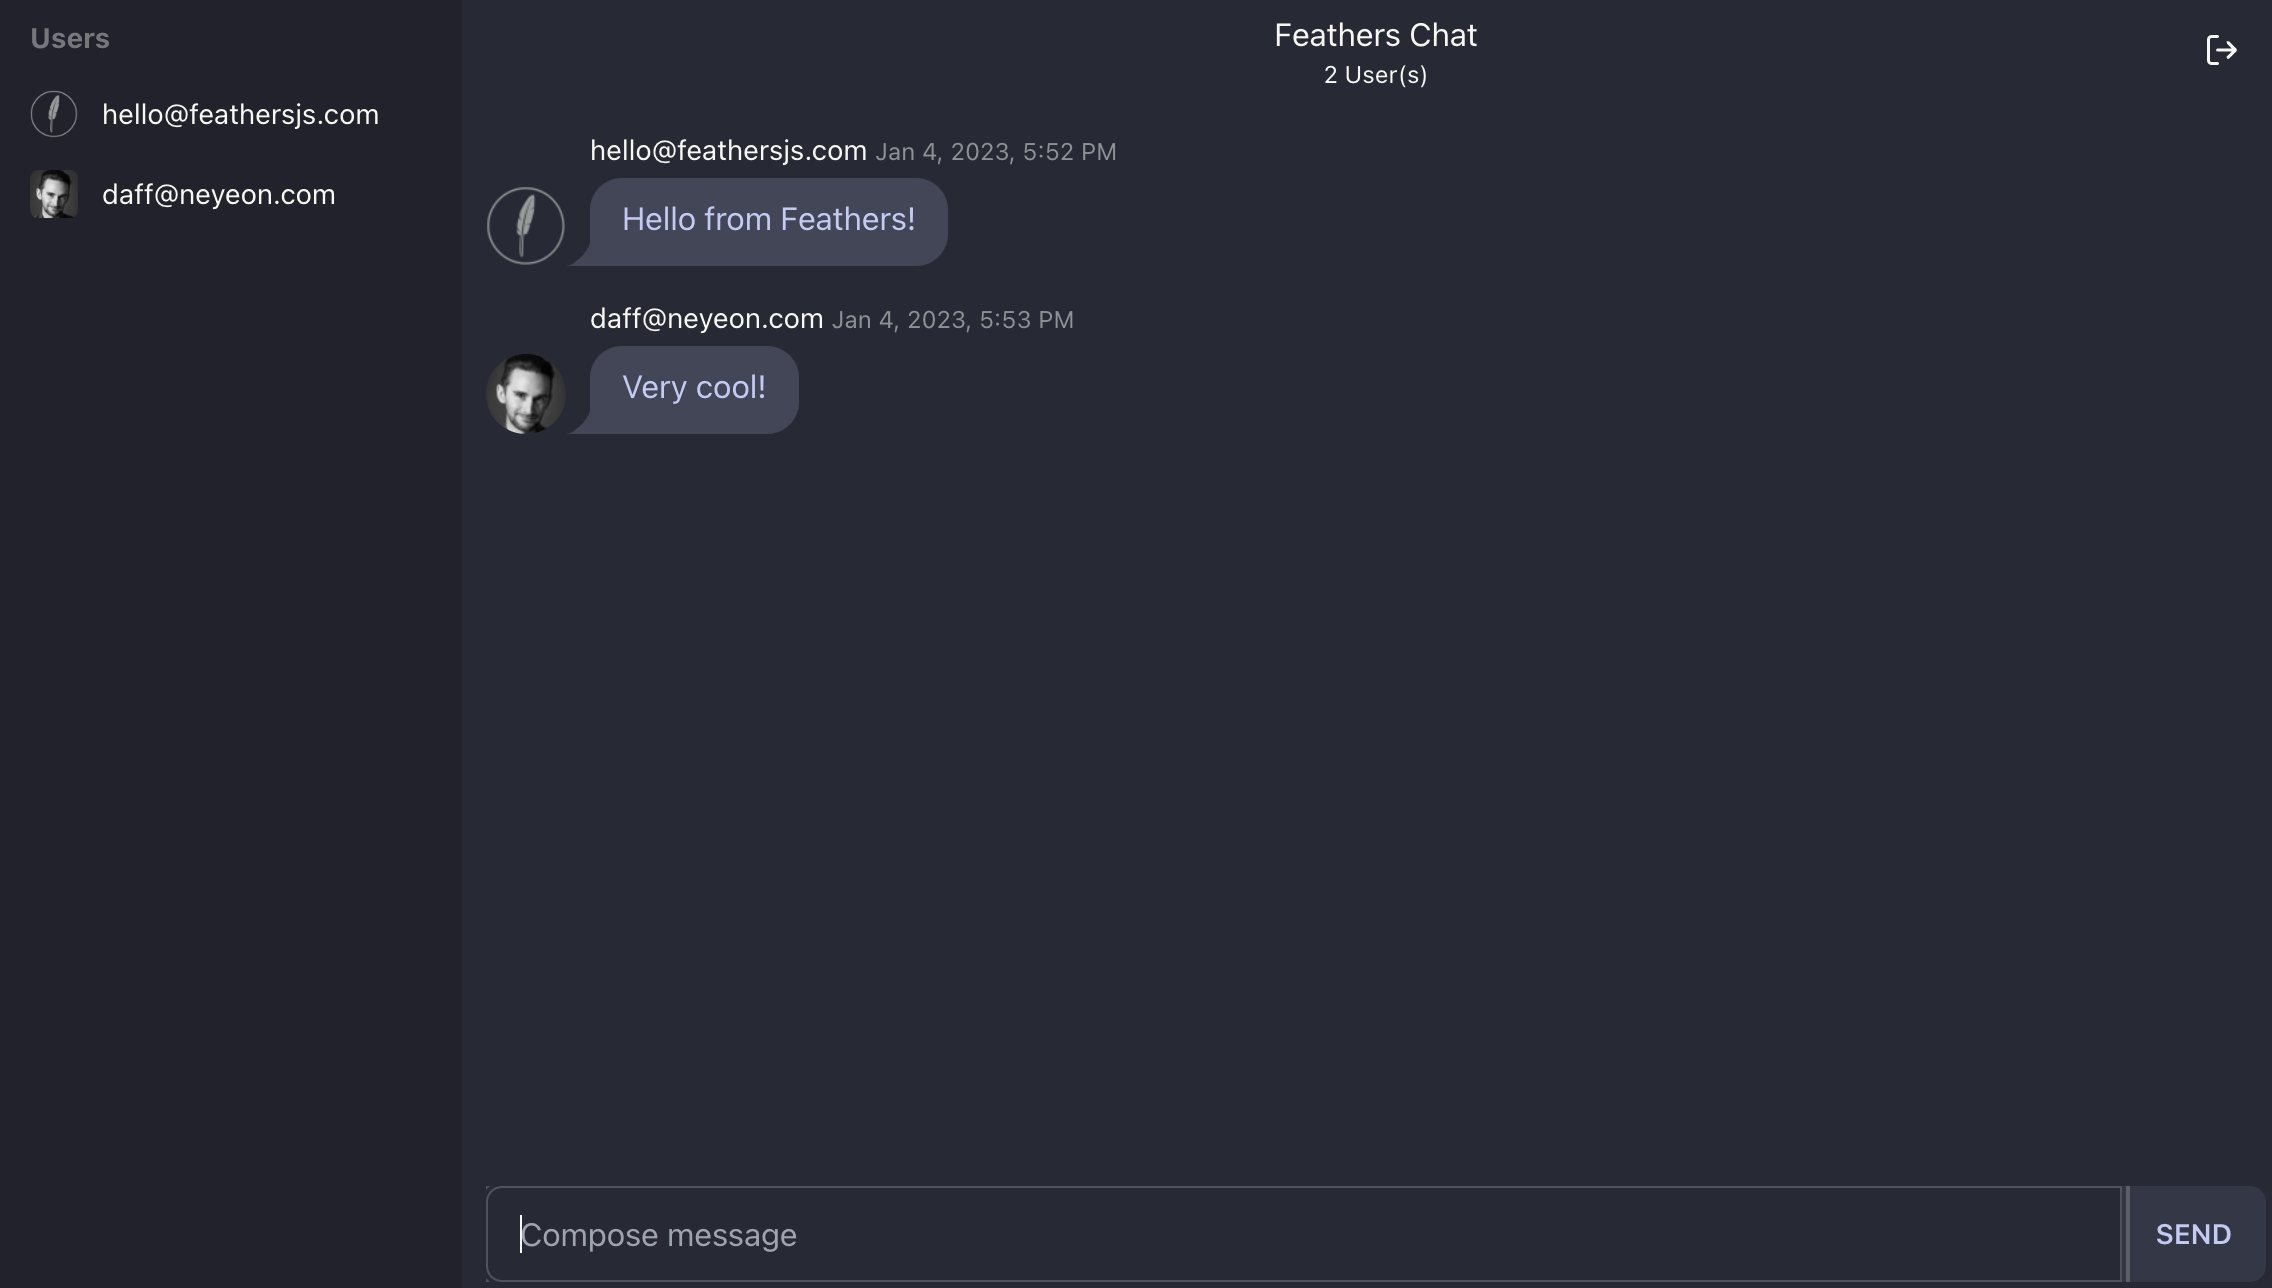
You can find the complete example in the feathers-chat repository.
Generating the application
You can create a new Feathers application by running npm create feathers <name>. To create a new Feathers application called feathers-chat we can run:
npm create feathers@latest feathers-chatIf you never ran the command before you might be asked to confirm the package installation by pressing enter. The @latest in the command makes sure that the most recent released version of the CLI is used.
Note
Since the generated application is using modern features like ES modules, the Feathers CLI requires Node 16 or newer.
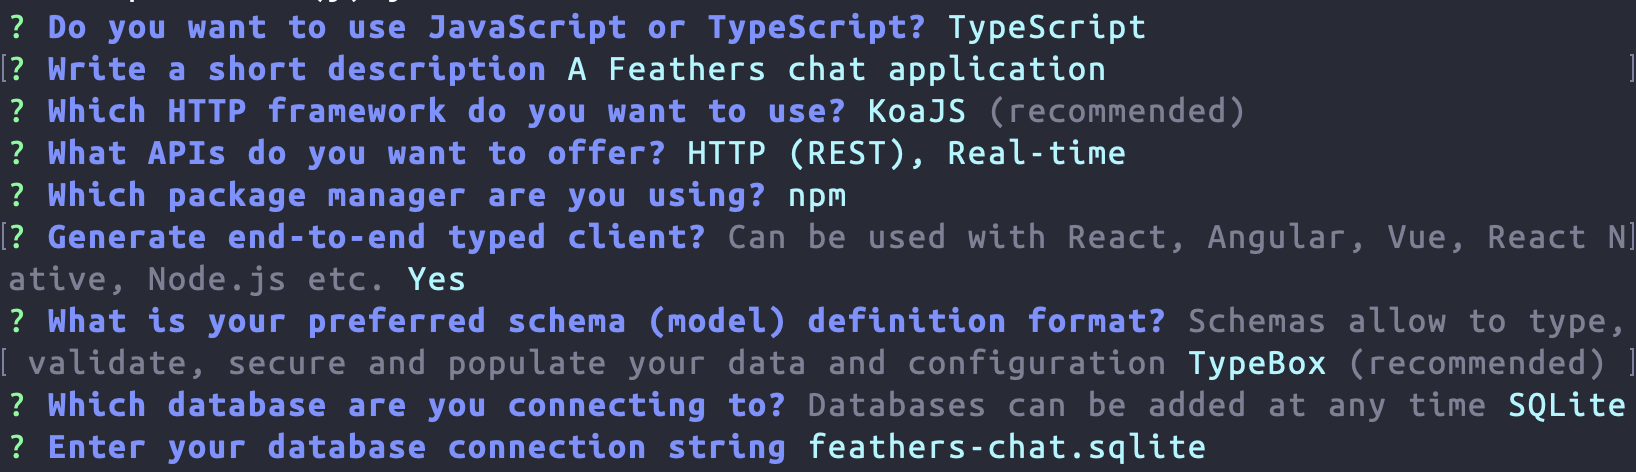
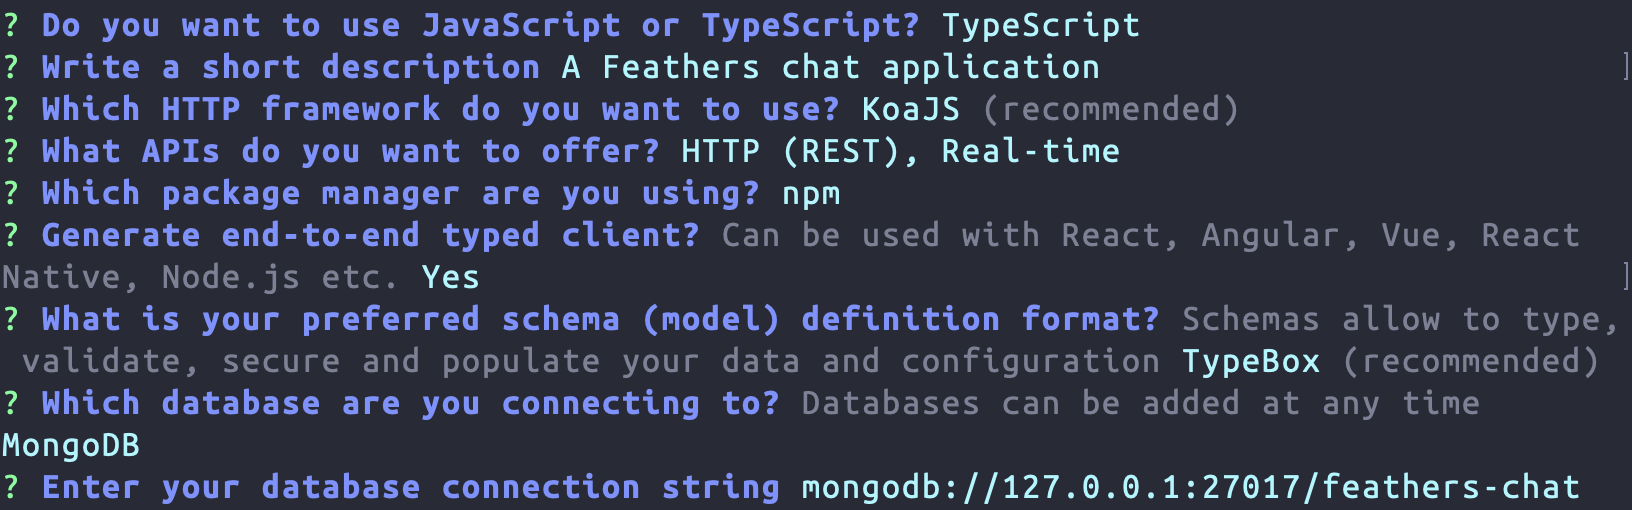
First, choose if you want to use JavaScript or TypeScript. When presented with the project name, just hit enter, or enter a name (no spaces). Next, write a short description for your application. Confirm the next questions with the default selection by pressing Enter. If you choose a database other than SQLite, make sure it is reachable at the connection string. For following this guide using MongoDB, change the database selection in the dropdown below.
Once you confirm the last prompt, the final selection should look similar to this:
Note
SQLite creates an SQL database in a file so we don't need to have a database server running.
Sweet! We generated our first Feathers application in a new folder called feathers-chat so we need to go there.
cd feathers-chattip
Most generated files have a page in the CLI guide which contains more information about the file and what it does.
Running the server and tests
The server can be started by running
npm run compile
npm run migrate
npm startnpm run compile
npm startnpm startAfter that, you will see the Feathers logo at
http://localhost:3030Note
You can exit the running process by pressing CTRL + C
The app also comes with a set of basic tests which can be run with
npm testThere is also a handy development command that restarts the server automatically whenever we make a code change:
npm run devNote
Keep this command running throughout the rest of this guide so it will reload all our changes automatically.
What's next?
In this chapter, we've created a new Feathers application. To learn more about the generated files and what you can do with the CLI, have a look at the CLI guide after finishing the Getting Started guide. In the next chapter we will set up user authentication.